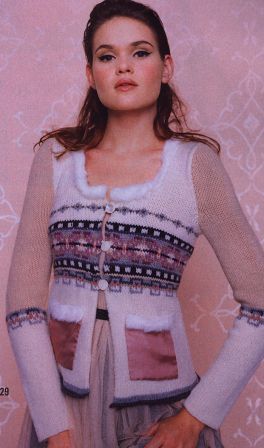
Anyone remember this?
Ahem. OK, I admit I’ve been stalling a bit. Last time, I said I was going to address the fitting issues, which leads me straight to a couple of my personal bugaboos.
Let’s just state right up front that I have dinky arms. They are so short, I can shop in the Petite section and STILL have to shorten sleeves. They are so short, it is an ergonomic issue: I am forever leaning right up against the front of, say, the kitchen sink to reach, say, the faucet, and my jeans always end up with a little worn patch right on the fly. (I kid you not – it took me years to figure that out, but it’s the truth.)
Rock Star didn’t believe me, and she made me stand next to her and compare arm length. My arms are so short, they are shorter than Rock Star’s arms, and she is – um – not tall.
I am of average height, but I have learned over the years that this is because I have disproportionately long legs stuck on what is unmistakably a petite torso. (Although it could be worse – it could be the other way around.)
So: in most patterns, I have to take off a fair amount of sleeve. I also have to hike up the armhole by about an inch. If I am making a sleeveless garment, not to worry: I just cut an inch out of the part between the armhole BO and the neck shaping. (And Sandi wonders why I am always drawn to sleeveless garments…)
But a garment with any kind of shape, with sleeves – now you’re talking sleeve cap adjustments as well. Hoo, boy.
There are a lot of ways to go about gathering custom body measurements. One good one is to draw a "sloper" of yourself. This technique was covered in an article in the S/S ’89 issue of Vogue Knitting, "Designing for Special Sizes", by Margery Winter. It was reprinted in their 25th anniversary book, about which I cannot say enough good things.
Side note: When that book came out, I thought it was going to be a kind of reprise of the "Then & Now" feature that I had missed so much. I was even more thrilled to find that it is a collection of many very useful articles from the previous 25 years of VK. Buy this book!! if only for two articles: this one, and the one titled "Smooth Transition: Aunt Jean’s Invisible Jog" from the S/S ’00 issue, by Cindy Sauerwald. This is absolutely the best method of avoiding the "jog" in Fair Isle or stripes in the round, hands down, no contest. I have no idea why this technique has not been widely embraced by the knitting world, but maybe it is because the "jogless jog" has a better publicist than Aunt Jean. I was lucky enough to find this article and use this technique on my very first Lopi sweater and thought, "That was simple. What’s the big deal?" I briefly explain it in my "Lisa’s Fair Isle Hat" pattern, but really you should read the article and commit it to memory. You’ll never need another technique, ever.
Along with my paper sloper, I have an old, oversized, ragg wool sweater from college days, that I have pin-fitted to myself to use as a measurement guide. You have probably read the advice, "take a measurement off a similar garment you already have that fits." Good advice, but where exactly do you get the similar garment that already fits? (and if you already have one, why are you knitting another?) So, I took this old sweater and basically pinned it to fit my body with very little ease, so I can take accurate measurements of knitted fabric off it. I can also mark on it with a Sharpie things like, just how low I want a V neck to dip, or where a 3/4 sleeve should end. In sewing, it’s called a "muslin" but I guess here we’d have to call it a "wool".
Anyway, measuring from the shoulder bone to the wrist, I came up with a desired sleeve length of 21.5", vs. the pattern sleeve length of 23.75". So, I had concluded I needed to shave about 2" off the sleeve length: ideally, 1" out of the cap (to correspond with the 1" that also needs to come out of the armhole on the bodice, as mentioned above) and 1" out of the length of the sleeve below the underarm. Fortunately for me, the sleeve cap here has a very nice section of "work even for 24 rows" which is a great place to remove 1" of length. Otherwise, I’d have to recalculate all kinds of sleeve cap shaping.
But still, I procrastinated on the actual sleeve knitting, with fear of failure looming over me. And the holidays usually kick my a$$ anyway, with this year being no exception.
Then, with perfect timing, the new year brought the latest issue of VK, where I found a rather nice article by Lily Chin about adjusting sleeve length. I used that not only as a kick-in-the-pants to get me going on this project again, but also a double-check against what I had already figured out. So, using the Lily Chin method, here are the calcs for my sleeve adjustments:
Find total length of garment as designed, from center back neck to wrist:
- neck width = 7"; half of that = 3.5"
- shoulder width for my size (did I mention I’m making the second size? Based on my bust measurement of 34.5" I chose the finished size of 35.5") = 3"
- sleeve cap length for my size = 6.75"
- sleeve length = 17"
for a total [center back neck to wrist] length of 3.5 + 3 + 6.75 + 17 = 30.25"
My measured [center back neck to wrist] = 28 on the left and 28.375" on the right (as measured by long-suffering, patient DH).
So, basically 4" need to come out of the whole thing, or 2" on each side. This jives excellently with my other measurements & calculations. However, I like the Lily Chin method better than my previous method, as hers takes into account the shoulder width of the garment, as well as the sleeve itself.
OK, so now time to start knitting, which means time to make the tracking sheet for the sleeves. And first, we need to know just how many rows I am going to knit.
I already did a gauge swatch, and when I said I was getting gauge, I should have been more clear that I was achieving the proper stitch gauge, and was close enough on the row gauge. Accurate stitch gauge is more important than row gauge, because stitch gauge usually is what determines the width of a piece of knitting: once you cast on, the width of your piece is set in stone, so to speak. The length of the piece is determined of course by the number of rows, with which you can always fiddle.
I admit to cheating a bit, in the order of things as described here. In reality, I have already started knitting the first part of the sleeve, since I knew I would be making my adjustments towards the end, at the underarm bindoff and in the cap. So, I was able to verify my actual row gauge over 60 rows of actual sleeve. Here’s an important and useful tip from the engineering world: the more data you take, the more you average out potential errors. In other words, if you measure gauge once, you have much more potential for error than if you measure, say, 5 times and take an average. In this case, if you measure over 60 rows, you average out far more error or inconsistencies than if you measured over a mere 20 rows (or fewer!) of gauge swatch. Extra data is cheap insurance against measurement errors.
 Anyway, my 60 rows measures 8-7/8 inches, so I have a row gauge of 60 / 8.875 = 6.75 rows per inch. The pattern gauge is 7 rows per inch, so already we know that I am going to need fewer rows to achieve a given length of sleeve. Aaaand a bit more math:
6.75 rows per inch x 21.75 inches desired sleeve length = 147 rows total.
6.75 rows per inch x 16 inches desired length to underarm = 108 rows to UA.
6.75 rows per inch x 5.75 inches new sleeve cap length = 39 rows in the sleeve cap.
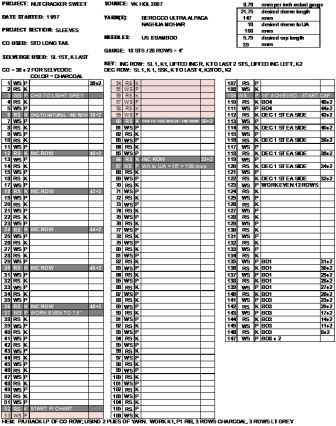
So now I go to my trusty computer and make a spreadsheet with 147 rows marked out, along with exactly what’s supposed to happen on every row, or at least every row that matters. Color changes on rows 3, 6, and 60; FI chart worked over rows highlighted in pink, etc etc.
Lest you think this is way too much work prior to actually knitting, I find that doing all the thinking up front allows me to focus for a short time on the tricky parts, and then I can knit away, carefree and secure that I won’t need to rip out because I mis-counted the increases or forgot to start the sleeve cap or something. Nor will I spend time squinting alternately at my knitting and at the pattern, trying to figure out just where I left off the night before, or the week before, or just how many of those increases have I done? Nor will I spend time trying to talk myself out of ripping out something because I was wrong about where I left off the week before and well, it’s "only a few" stitches off.
Once this technique really saved my bacon, as the pattern said to repeat something 4 times more and while making the tracking sheet I discovered what they meant was 4 times total. Now, to me, that’s worth a few minutes and a spreadsheet.
If that’s not enough incentive: let’s just say that a whole lot more of the knitting world becomes "TV knitting" or "Knit Night knitting" once you have it all figured out up front.
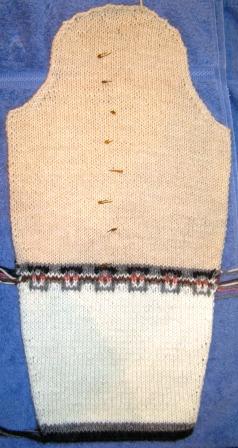
 And finally, I finish knitting the sleeve. Hooray! Looks pretty nice, but will it fit? As a final test, I take the sleeve to the shop and consult The Oracle, otherwise known as Sandi. She agrees: it looks like it is perfect. Even more hooray!
BTW, for those (like The Pats), who don’t like clicking clickers or turning knobs to count rows: I don’t necessarily tick off every stinkin’ row on that sheet. That’s what those markers in the sleeve are for: one every 10 rows, and I know just where I am on that sucker, all the time, every time. And I can even put them in after the fact, iffen I am too lazy to go get them and put them in whilst happily knitting.
Oh, yes, let’s not forget: you’ll have to trust me that there’s a lovely 6 row ribbed hem (knitted with only 2 plies of yarn), folded under at the bottom edge.
Next up: fitting the sweater body. I promise that will be a lot easier, or at least a lot less fraught with paranoia.

2 comments for “Nutcracker Sweet, Part 4 – the sleeves”