The Solution
In the previous post, I showed how we need to find a conversion factor (CF), which is just a number that allows us to convert the weight of a ball of yarn to length — and for that we need to be able to accurately weigh something that weighs very little, in order to get an accurate calculation of length. Historically, there hasn’t been a good way to do this. But technology has caught up to knitters’ needs!
The key to the solution that meets all the criteria is to get a digital scale that can measure less than a gram.
With this tool, you can cut a short length of yarn, weigh it, and get a very accurate answer. Quick and easy too, not a lot of yarn handling. And, it works on ANY yarn.
The only con here is that all scales have limits. For this method to be accurate, you have to be able to weigh two things accurately:
- a short yarn sample that is less than a gram
- your whole ball of yarn that is likely to be in the 50-100 g range
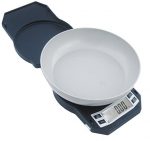 I tried to find one scale that could do both jobs, and it’s tricky*. It needs to have good accuracy at the sub-gram level, yet also have a high enough upper limit AND a big enough surface to weigh a 50-100 g ball. This one might be able to do both jobs adequately: it weighs down to 0.01 gram, as long as your sample weighs at least 0.1 g to begin with, and it appears capable of weighing a full ball also. You will sacrifice a bit of accuracy, as compared to the 0.001 gram scale that I use — but if you can only have one tool for the job, this one looks like it can do both tasks, and as of this writing it is available for under $25.
*Actually, such scales do exist, but they are often lab grade, and that costs quite a bit more. It is usually cheaper to buy two different scales to do the two different tasks, or even borrow one, if you don’t already have one in your kitchen. Also, keep in mind that a lot of yarn stores have a digital kitchen scale on the premises.
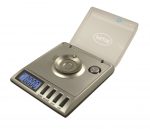 I already had the kitchen scale, so here’s the sub-gram scale I bought. The engineer in me couldn’t resist the ability to measure down to a milligram. The rating of this scale is 20 x 0.001 g, which means the maximum this scale can weigh is 20 g, so it’s not capable of weighing full balls of yarn at 50 or 100 g. It’s also pretty dinky, which makes it super cute! but it also means no way can you fit a ball of yarn on there.
The price on this one seems to fluctuate quite a bit, so if it’s over $25, take a look at this one that looks almost exactly like it.
If you need a digital kitchen scale, you can pick those up a lot of places, but this one is very similar to mine.
Bear in mind that there are cheaper sub-gram scales available, but many of them don’t come with calibration weights like mine did. I like the fact that I know my scale is calibrated as well as accurate. However, you can test the accuracy of any sub-gram digital scale by weighing a US bill of any denomination, which should weigh exactly 1 gram. If that is off, you can adjust your subsequent measurements accordingly.
OK, now that you have the scales — how do you use them?
EXAMPLE 1 – Partial ball of known yarn
Using conversion factor (CF) from Ravelry
Equipment: digital kitchen scale that measures in grams
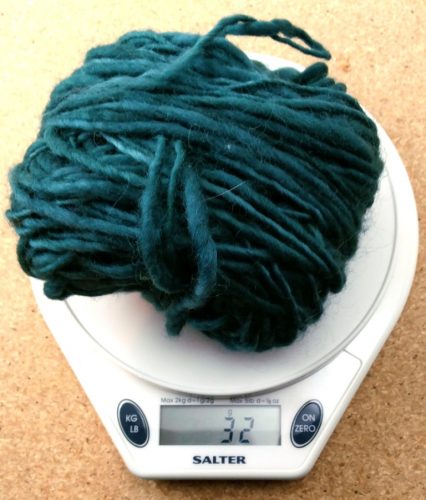
We’ll start with a very basic example, using label information to get the conversion factor. So you have a known ball of yarn, and you’ve used up part of it, and you want to know how much of it you have left.
Step 1: consult the yarn label or look the yarn up on Ravelry to find out the length and weight of a full ball of the yarn.
I have a partial ball of Manos del Uruguay Wool Clasica. The label is long gone, but Ravelry tells me a full skein is
Length = 138 yards (126 meters)
Weight = 100 grams (3.53 ounces)
Step 2: Calculate the conversion factor of full ball length / full ball weight
In this case, 138 yards / 100 grams = 1.38 yds / g
Step 3: Weigh your partial ball. This partial ball is 32 grams.
Step 4. Multiply Step 2 x Step 3.
1.38 yds / g x 32 g = 44.16 yards
Result Check
Since this was only 40 or so yards, I did use a direct measurement method (my niddy-noddy) to check this result, and I got 45.95 yards.
Those two answers (indirect and direct) differ by less than 2 yards (1.8 yards to be precise). If you assume the direct method is the “correct” answer, then the indirect method was off by about 4%. Which is pretty good accuracy, especially if it means not having to re-skein and re-wind a whole lot of yardage.
However, when I weighed this ball, my scale was actually “flickering” between 32 and 33 grams. When that happens, it means that your result is right on the measurement error: in other words, my partial ball actually weighed 32.5 grams, and the scale couldn’t decide whether to show me 32 or 33.
If I use 1.38 yds / g x 32.5 g, I get 44.85 yards, which is even closer to the result I got with the direct measurement method. And it means the indirect measurement was off by only 2.4%, which is in the 2-3% accuracy range that I expect to get with this method.
EXAMPLE 2 – Partial ball of mystery yarn
CF calculation, Methods A and B
Equipment:
(1) digital kitchen scale that measures in grams;
(2) digital scale that can measure less than a gram
Suppose we don’t know what the yarn is, or Ravelry doesn’t have length and weight info. In this case we need to come up with our own conversion factor.
There are two ways to do this, (A) involving less math, but more accurate sampling, and (B) involving any length of sample, but a bit more math.
Method A
Step 1: Cut a sample of yarn to length as accurately as possible:
- For lighter yarns such as laceweight, cut a yard (36”).
- For medium-weight yarns, cut half a yard (18”).
- For bulky yarns, cut ¼ yard (9”).

Step 2: Weigh the sample in grams: I wrap the sample into a loop around my finger and put the end through the middle, to keep it compact enough to fit on my cute dinky little scale!
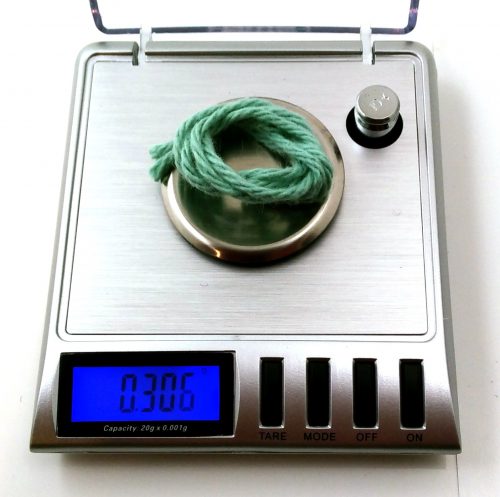
Step 3: Weigh the ball in grams.
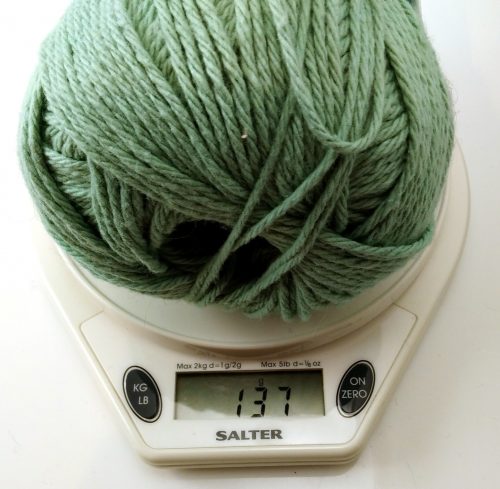
Step 4: Calculate yards of yarn in ball.
| Length of sample | Yards in ball |
| 36” | Weight of ball / sample weight |
| 18” | Weight of ball / sample weight / 2 |
| 9” | Weight of ball / sample weight / 4 |
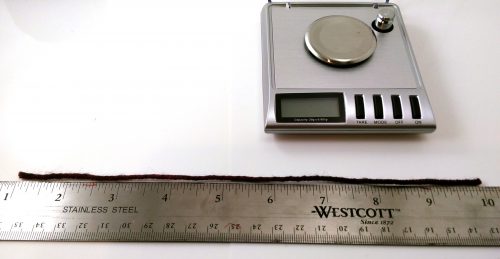
Here, 137 g / 0.306 / 2 = 223.9 yards.
Result Check
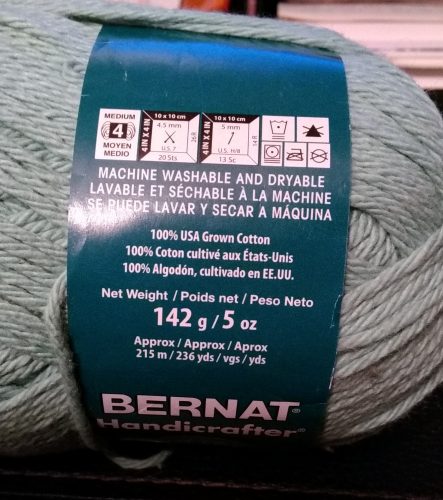
OK, what I used for this example isn’t really a mystery ball. This happens to be a very nearly full ball of cotton that I used a very small amount of for an amigurumi project. It was about 236 yards to start with, so the idea that I have 224 yards left is very reasonable.
Also, we can check this result using a version of Method 1, since we have the ball info. Calculating the conversion factor from this we get
142 g / 236 yards = 0.601 g/yd
If we divide this by 2 — because our sample was only half a yard — we find that our sample should weigh 0.301 g, and we got 0.306 g. This is off by only 1.7%!
Method B
This really works the same way, except that you can use any length of yarn you want as the sample.
Step 1: Cut a sample of yarn to any convenient length and measure that length in inches.
Step 2: Divide that length by 36 to get yards.
Step 3: Weigh the sample in grams.
Step 4: Weigh the ball in grams.
Step 5: Calculate yards of yarn in ball.
sample length (yards) x weight of ball (g) / sample weight (g) = yards in ball
Using the same numbers as above, we have an 18″ sample length so we get 0.5 yards in step 2.
0.5 yards x 137 g / 0.306 = 223.9 yards.
EXAMPLE 3 – Troubleshooting
Very stretchy yarn
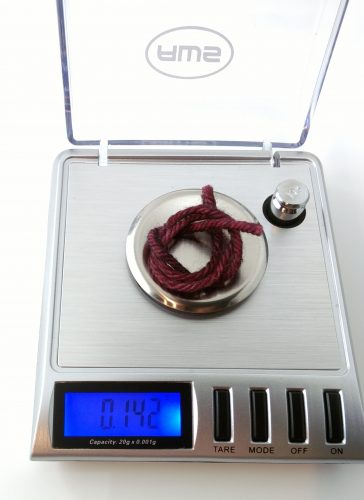
Here, I have a 9-inch sample that weighs 0.142 g, and a ball that weighs 51 g.
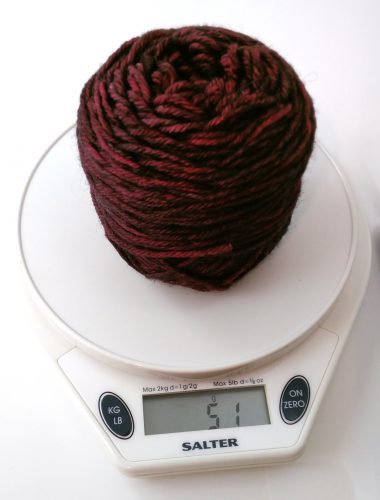
So using Method A:
51 g / 0.142 g / 4 = 89.8 yards.
Result Check
However, when I double-checked this result with my niddy-noddy, I got 111.5 yards.
What happened?
Well, this is Tosh DK, which is a very springy, stretchy yarn. 6.5″ unstretched = 8″ stretched.
So I tried again, only this time I used the stretched length of my sample, and therefore had to use Method B to calculate:
Stretched sample length = 8″ / 36″ = 0.222 yards
This sample weighed 0.103 g, and the ball was 51 grams.
0.222 yards x 51 g / 0.103 g = 109 yards, which is within 2-3% of the 111.5 yards I got with the niddy-noddy.
And while neither Ravelry nor the yarn label gives a weight per hank for Tosh DK, I found a published weight at WEBS, which says 100 g = 225 yards.
Following Example 1, this gives a CF of 225 yards / 100 g = 2.25 yards / g, which confirms my 51 grams should be around 114-115 yards.
Important tip: when measuring the length of your sample, you want to be sure to take into account any stretch in the yarn. If the length changes appreciably with stretching, you should measure the length of the piece under tension, because that is how we use it.
EXAMPLE 4 – More troubleshooting
Thick and thin yarn
I decided to check my Wool Clasica from Example 1 using both calculation methods. And I got very different results.
I cut a 9″ sample and weighed it; then I cut that sample into a 5″ and a 4″ length, and weighed those.
And I got very different results for the conversion factor: 1.15, 1.02, and 1.42, respectively — whereas Ravelry’s info gave us a CF of 1.38.
What happened?
Well, Wool Clasica is a thick-and-thin yarn. Notice that if I cut this sample at the 4″ mark, I end up with a fairly skinny piece and a fairly fat piece.
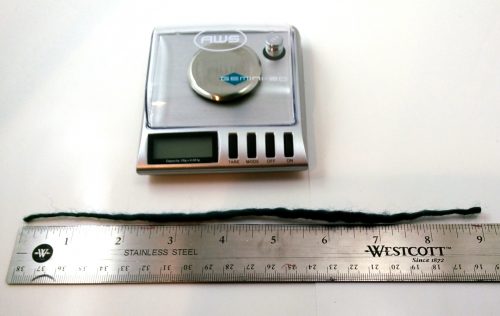
Another important tip: if you are measuring a yarn with a lot of variation along the length, take a larger sample for better accuracy. Ex. the Ravelry information for Wool Clasica that we used before averages out the thickness variation over an entire ball.
EXAMPLE 5 – CSI Edition
Mystery yarn #1
If you happen to be trying to identify a partial ball of mystery yarn, you can calculate the conversion factor as in Example 2, and then compare it with published yarn info, as in Example 1.
I recently did this with some yarn from SCRAP that I thought might be Elsebeth Lavold Silky Wool.
I cut a 4″ sample from each ball and weighed each one.

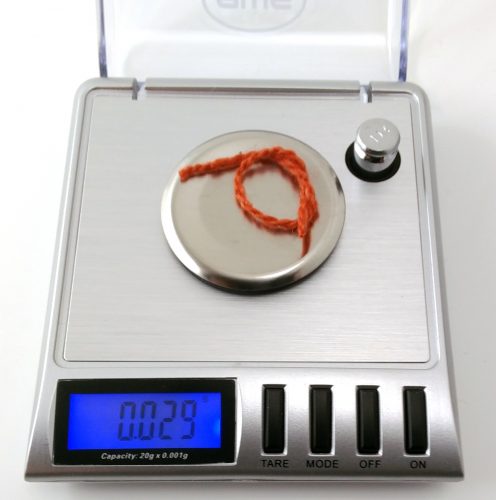
My three pieces weighed .029, .031, and .030 g, which averages out nicely to .030 g.
4″ sample length / 36 = 0.111 yards
0.030 g / 0.111 yards = 0.270 g / yd
According to Ravelry, 50 g of Silky Wool = 192 yards, or 50 / 192 = 0.260 g / yd
This, plus the fact that I’d tested the yarn for fiber content and came up with mostly protein fiber (but not 100%) makes me very confident that this is indeed Silky Wool, which is 45% Wool, 35% Silk, 20% Nylon.
Mystery yarn #2
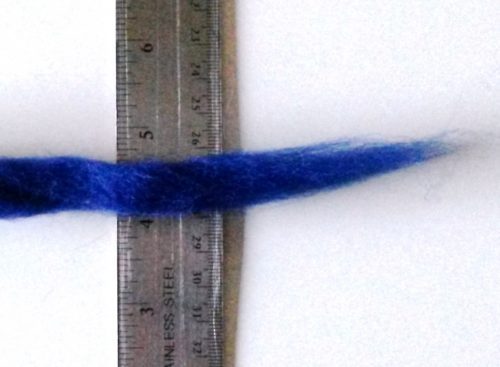
We got some super-duper bulky yarn donated at SCRAP and I was trying to identify it, in order to figure out how to price it. It bleach-tested as 100% protein fiber (wool), so I did an advanced search on Ravelry for single-ply, jumbo 100% wool. I got three candidates, only one of which matched the conversion factor I calculated from my sample. And when I checked the available colors of that yarn, there were only 8 in total, and two of them were a match for the colors that had been donated. Voilà! This can come in very handy if you are trying to figure out what something is, so you can buy more of it. (Not that I did ANY SUCH THING.)
EXAMPLE 6
Play Yarn Chicken Like A Boss — and WIN
When making project decisions, I like to play it safe. So here’s my suggested protocol for yarn chicken: (1) subtract the expected measurement error from your yardage measurement, and (2) add double the amount of expected error to your listed yarn requirement as a cushion, before you compare the two.
For example, I know that in general, my scales give me yardage results that are accurate to 2-3%. I would subtract that amount from my yardage measurement; then add a 5% cushion to whatever the pattern says I need, and then compare those numbers:
- Suppose I have a project that requires 150 yards of yarn.
- Using my scales, I have calculated that I have 160 yards of my selected yarn.
- I know my calculation could be off by up to 3% error: 0.03 x 160 = 4.8 yards.
- This error could go either way (more yarn or less yarn) but in yarn chicken we are only worried about having too little, so we only have to look at the “less” side. So I could reasonably expect to have up to 5 fewer yards than the 160 that I calculated, or about 155 yards.
- If I add a 5% cushion to the yardage that I need, that is 150 x 1.05 = 157.5 yards.
155 yards vs 157.5 yards — this would be a super exciting game of yarn chicken. It might kill me.
In this case, I would not start the project unless I had nerves of steel and a lot of wine, or could figure out a way to use just a little less yarn. Often you have more options for this before you get started, rather than at the very bitter end where you have far fewer choices: maybe you could cut back on ribbing at the beginning by a couple of rounds, or cast on fewer stitches to make a scarf a tiny bit narrower.
Conclusions
- This yardage measuring method is the only one that fulfills all my major criteria: accurate, easy, works on any yarn, and inexpensive.
- You do need to be a little careful with your sampling method. Stretchy yarns need to be stretched. Thick and thin yarns do better with a larger sample.
- You can use this technique not only to check yardage of any yarn, but also to help in identifying mystery yarns.
- In my experience, this method is usually accurate to about 2-3%. If you use a less accurate scale(s), your total error might vary. Follow Example 1 to check the accuracy of your own equipment.
- If you want to be really safe when making project decisions, double your error range and give yourself that as a cushion.

