Click here to view pattern listing on Ravelry
Click here to view Beach Gallery Scarf II
A couple of months ago I was out at the coast, and saw some knitted scarves in a gallery. Technically speaking, they were very simple, but they were beautiful, and the price tags on them were in three digits, in some cases. So I was inspired to try to create my own version.
No photography was allowed in the gallery, so I will just list the characteristics I observed:
Stitches
- Garter stitch worked back and forth, in simple shapes such as a long rectangle (i.e. a standard scarf shape) or a triangle.
- Elongated stitches were included on some pieces.
- Stitches were big, with gauge in the neighborhood of 2 – 3 sts per inch or even bigger.
Yarn
- 2, 3 or 4 strands of yarn were held together, mostly DK or lighter weight.
- Lots of yarn changes within most pieces, although some did have one yarn that stayed continuous throughout the whole piece.
- Fiber content, according to the tags, was anything and everything.
- More than half the yarns were smooth, solid colors, but there were some multicolors, textures, and novelties in there as well.
- There was no glitter or sparkle in the pieces I saw, and only a touch of shine.
Details
- Large buttons were used for closures, although the stitches were so loose that no buttonholes were needed.
- Most pieces were fringed, and in some cases it looked like the yarn ends from color changes were incorporated into the fringe. Some yarn ends were braided into decorative tassels, and some had twisted fringe, mixed in with regular applied fringe.
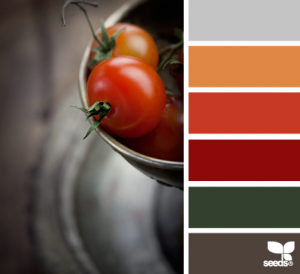
To get started, I pulled up this color scheme from one of my favorite color sites, Design Seeds. Then I grabbed an empty tote, and went looking for some leftovers.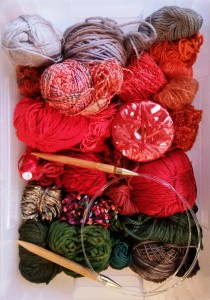
I’ve been knitting for about 30 years at this point, so I have a LOT of leftovers. And I think for this kind of project, the more, the merrier. So, I wound up with this box of yarns, and a size 15 needle. It contains everything from sock weight yarns to a couple of worsted-bordering-on-aran weight yarns. There are a few shiny and novelty yarns in there I was not 100% sure about, but hey, this is an experiment, right? As it turns out, I didn’t use anything shiny but I did use textures.
Comparing the box with the original color scheme, I obviously went a lot brighter on the reds and oranges, and I really didn’t have much in the dark grey or bright yellow-orange departments. But it still works.
I decided I wanted to do a triangular kind of shape, but not so pointy: a “banana” shape. For a banana-shaped scarf in garter or seed stitch, you start with 3-4 sts, and increase at the beginning and end of every row.
For each yarn change, I simply chose a few yarns out of the box and held them together. Usually 3, but anywhere from 2 to 5 strands of yarn, depending on the size of each yarn.
I was inspired by the original scarves and this crochet pattern to add a boatload of fringe. Since I knew I wanted to add fringe, I initially decided to do my increasing with YO’s and do them 1 stitch in from the edge, so I would have reasonable holes to put fringe into. I defaulted to garter stitch for Attempt #1:
Every row: K1, YO, K to last st, YO, K1
This will work fine if you are using a single continuous yarn or combination of yarns. But due to habit, I was slipping the first stitch, and with my frequent color changes, the YO’s ended up being basically just kind of a mess.
So for Attempt #2, I gave up on the edge stitch and the YO eyelet, and also decided to go with seed stitch instead, to blend the colors a little better:
Every row: kfb, seed stitch* to last st, kfb
* seed stitch: K1, P1 and in subsequent rows, purl the knits and knit the purls. I found it easiest to do my kfb at the beginning of the row, then look at the second st on the left needle in the previous row. If it was a knit, then I started the new row with a knit, and vice versa.
I got this much scarf done and took a step back to evaluate. Loving the colors. Loving the fringe, although there isn’t enough of it. But… the fabric was just a tad too firm for my liking. It wasn’t bad, but it could be better.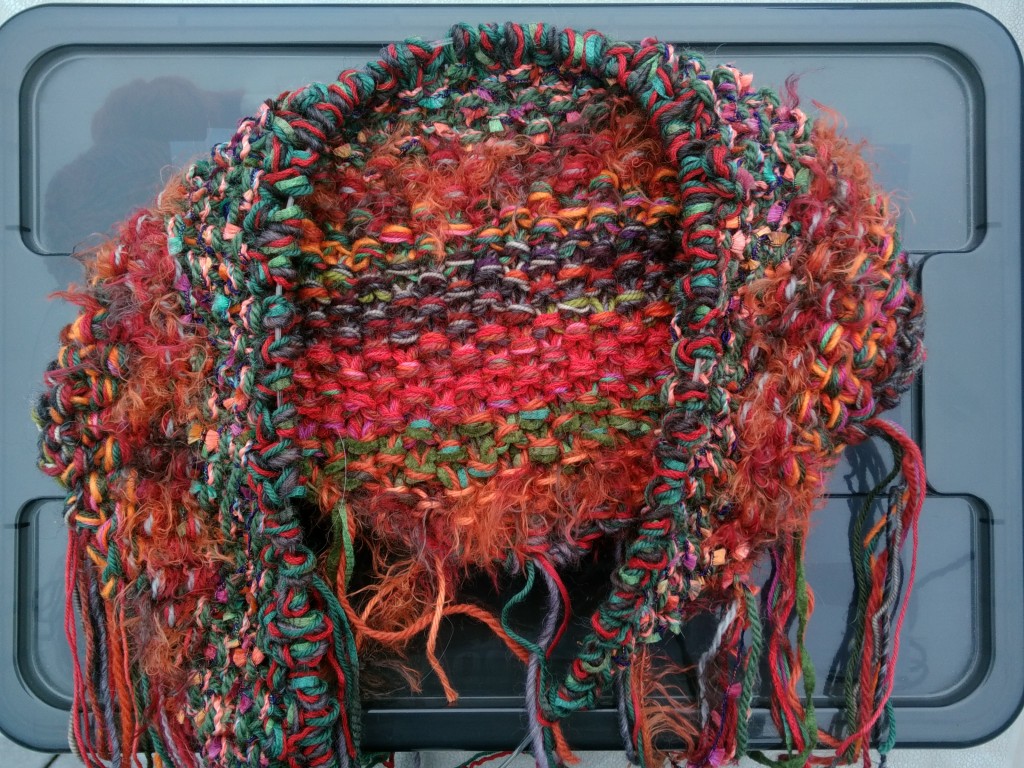
So — for Attempt #3, I went up to a size 17 needle, and started over, but this time I also cut and retied the yarn on every row, to make some *serious* fringe. Fringe is big this year, and nothing looks worse IMO than skimpy fringe. When it comes to fringe, go big or go home!
I quickly realized that if I did an even number of rows in each new yarn selection, one side of the scarf would have fringe made up entirely of yarns tied to themselves, where the fringe on the other side would be yarns tied to other yarns, and I thought that could look weird.
To prevent that, you have to do an odd number of rows with each yarn grouping, so then you have a choice of 1, 3, or 5 rows. 1 row of each seems like not enough, and 5 seems like too many. So I mostly did 3 rows with each new yarn grouping: this makes the first fringe “mixed” (tied to the previous group) and then you get two fringes that are tied to themselves on either side of the scarf, and the next “mixed” fringe is on the other side of the scarf, which makes for a nice balanced fringe.
I draped a tape measure around my neck to see just how big I wanted this thing to be. I settled on about 45″ long at the top edge, which at my gauge of about 2 stitches per inch, and my odd number of stitches, meant I increased up to 89 stitches in the final row.
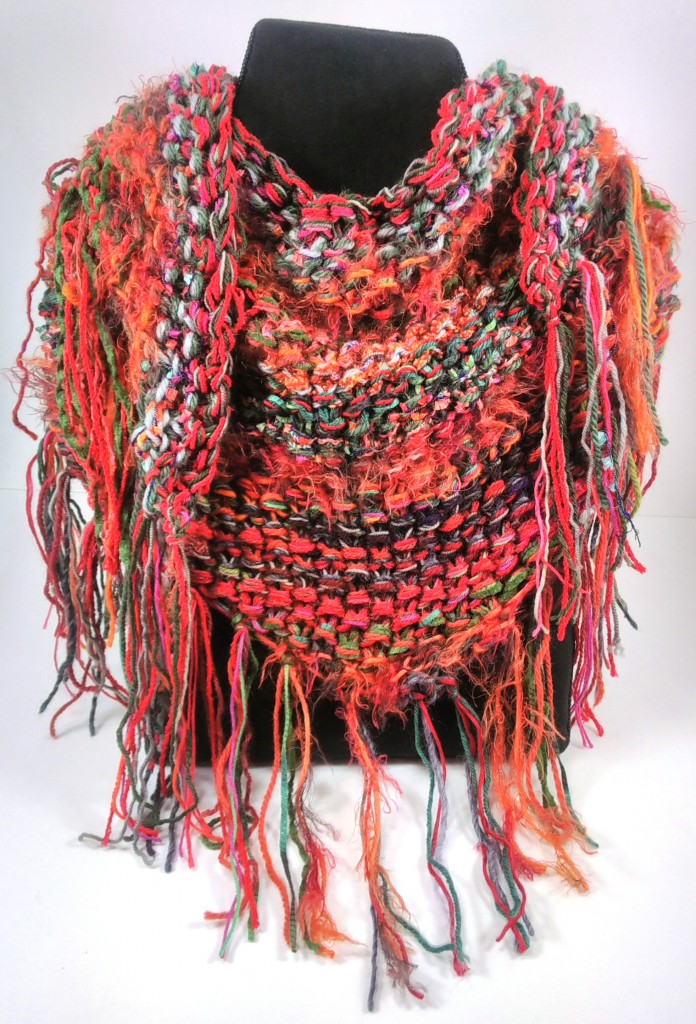
And here’s the finished product! I’m really pleased with it. Just the thing to brighten up the grey winter days ahead.
Here’s another version that I knit to raise funds for the Pulse Tragedy Community Fund in conjunction with SCRAP PDX. In the spirit of creative re-use, this was done all with leftovers from my extensive stash!


 Materials: assorted yarns; size 17 needles (or even 19’s if you’re a tight knitter)
Instructions:
Holding 2-5 strands of yarn together, CO 3 sts, leaving tail long enough for desired fringe. Cut all yarns, leaving enough length for fringe.
Every subsequent row:
Tie on 2-5 strands of yarn, leaving enough length for fringe.
kfb, seed stitch* to last st, kfb
Cut all yarns, leaving enough length for fringe.
Repeat this row, changing yarns as desired, until scarf is as large as desired.
Bind off all sts, leaving ends long enough for fringe. Bonus: no ends to weave in!
* seed stitch: [K1, P1] In subsequent rows, purl the knits and knit the purls. I found it easiest to do my kfb at the beginning of the row, then look at the second st on the left needle in the previous row. If it was a knit, then I started the new row with a knit, and vice versa.
4 comments for “Reverse Engineering – Beach Gallery Scarf I”