Soooo… you want to be a better knitter? Probably one of the single biggest wholesale improvements you can make to your knitting is: use edge stitches.
Unfortunately, this is one of those knitting things that sometimes I hear complaints about: that no one explicitly spells out this for you in a knitting pattern — you’re supposed to somehow just “know” about them, and how to do them.
Well, if you really want to be a better knitter, you’ll educate yourself! Read on, knitter!
Why use edge stitches?
Edge stitches, or selvedges, have so many advantages I will probably miss at least one or two — but you are welcome to add anything I miss in the comments.
New knitters ask me if one is supposed to “always” use edge sts. My answer is pretty much YES, except for one or two specialized cases.
Mostly, the advantages of edge stitches far outweigh any potential disadvantages. In the end, the three basic possibilities for the edge of your knitted fabric are that it is going to be either visible, seamed, or used to pick up sts off of later. For any of these cases, edge sts can make big improvements in appearance, and/or make your life simpler.
Most patterns do not include selvedge stitches in the directions – you must choose which technique you’re going to use, and then cast on extra, usually 1 or 2 sts each side — unless it is stated in the pattern that they are included. One exception is Anny Blatt patterns, which often will include edge sts, and usually say so (in the directions for “Fancy Stitch Pattern #1” or whatever).
Advantage #1: Neater edges
Edge st techniques are, for the most part, formulated to minimize that “loopy last st” problem — which everyone has, to some degree. The last st of a row is always going to be looser, because as you work the row you’ve “ooched” a lot of slack down to that last st, and now there’s nowhere else for it to go.
Thus, most selvedge techniques involve tightening the edge sts, in one of two ways: by slipping sts, to make them taller (because they have to stretch over two rows); or by working them so they are twisted (i.e. working “tbl” — through the back of the loop, or through the back leg, as you prefer). Both maneuvers help tighten up loopy edge sts.
Advantage #2: Better finishing
Using a selvedge technique kind of forces you to obey another basic rule of good knitting: for decent seams, all the shaping of your piece must take place at least one st away from the outer edges. Edges that have k2togs or SSKs right on them are pretty much impossible to seam properly. Instead, when you use edge sts, you can’t possibly do “decrease 1 st each edge every other row” with them as well. You have to move that shaping inside the boundaries of the edge sts — which is pretty much the point.
The same reasoning applies to picking up sts: it’s hard enough to do neatly without having to cope with k2togs in the middle of it as well.
Selvedges on garments
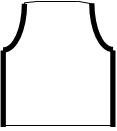
 Well, I’m all about the sweaters, so let’s talk about some garment specifics. One question I hear often is, what to do about the edge sts at the point of the underarm bindoff? Suppose your directions start you off working on 50 sts, to which you have added +2 edge sts (52 sts total). OK, so far, so good. That part is pretty easy to understand.
But now your directions say to bind off 4 sts at the beginning of the next 2 rows, to end up with 42 sts.
Do you instead bind off 5 sts each side, because you have those extra edge sts?
The answer is, no. You will still want to have two extra edge sts as you knit your way up the armholes — just like you did on the sides. After all, both areas are going to be seamed to something, probably.
So, you bind off only 4 sts each side, just like they tell you to. You will be down to 44 sts total, which is the 42 sts they want you to have, plus 2 for the “new” edge sts. (If it helps, you might think of it as the edge sts have just moved inwards by 4 sts apiece — but they are still there.)
It’s worth mentioning here that you may not want to use the same selvedge technique on the armholes as on the sides. On, say, a sleeveless top or vest, I might use my favorite slipped selvedge #2 for the sides, but switch to a seed st selvedge for the armholes and save myself a bit of finishing. If I make the seed st selvedge wider than 2 or 3 sts, it’s kind of hard to keep calling it a selvedge though — at some point, it might become a “knitted-in border” and have its own slipped selvedge, even.
Some finer points
Here are a few more detailed observations (some of which I can still remember learning the hard way):
Selvedges on shaped edges: Part of the function of a selvedge technique is to tighten up the edge sts. On a strongly shaped edge — for example, the curved section at the bottom of an armhole — this can be too much of a good thing. In this case, you may want to change your selvedge technique to a less drastic one for the curved area. A specific example would be using a double twist selvedge up the sides of a garment, but switching to slipped selvedge #2 or even just a knitted selvedge for the underarm shaping. (Teal Asian-style tank top.)
Selvedges on garter st: On stockinette st, a simple garter st selvedge works because row for row, stockinette st is TALLER than garter st. Having the first and last st in garter along the sides of a stockinette piece automatically causes those edge sts to be stretched a little taller, and thus pulls them in a bit, keeping them tidier. However, despite the name, this type of selvedge doesn’t work on garter st. For an effective edge st on garter fabric, you need to at least twist the edge sts.
Picking up sts: When deciding what kind of selvedge technique to use where, think about what you will be doing with the edge of the fabric later on. For example, if you want to later pick up sts along a stockinette edge and knit more stockinette fabric in a perpendicular direction, you will probably want to pick up 3 sts for every 4 rows. Therefore you may not want to choose a selvedge that gives you only 1 st for every 2 rows. (Baby sweater with knitted-on sleeves.)
Selvedge Techniques
Part of the reason that edge sts are not often spelled out is that there are lots and lots of ways to do them. It’s up to you to learn and implement — one way or twenty. Catherine Lowe’s “Couture Knitting Workshop” has about a billion of ’em in the first volume. Made my little knitting heart go pitter-pat, I tell you.
Here are a few of my own favorites. My advice is, test drive them on a swatch and see how they differ — then memorize one or two that you like to do, that suit your knitting style, and that you like the looks of. Your edges will thank you for it!
|
each st on both edges is twisted;
one selvedge st for every row
|
K into the back of the first & last st of every row.
|
Simplest.
|
|
(BEADED SELVEDGE)
no sts are twisted;
one selvedge st for every row
|
K the first 1 or 2 and the last 1 or 2 sts of every row.
|
Decorative. Can be bulky; results in slightly thicker seams. Fits to contours such as armhole curves. Will be obvious if you are not consistent.
|
|
each st on both edges is twisted;
one selvedge st for every 2 rows
|
(1) Slip the first st purlwise; knit the last st through the back loop (tbl)
(2) Slip the first st knitwise; knit the last st.
|
Not appropriate for picking up sts on anything but garter st – hard to pick up more than 1 st every other row
|
|
each st on both edges is twisted TWICE;
one selvedge st for every 2 rows
|
Slip the first st knitwise; knit last st tbl.
|
The extra twist produces a very tight edge. Same drawback as above.
|
|
CHAIN SELVEDGE
no sts are twisted;
one selvedge st for every 2 rows
|
1) RS rows: Sl first st knitwise; k last st
WS rows: Sl first st purlwise; p last st
2) If the last st of the previous row was knitted, slip first st purlwise wyif; if the last st of the previous row was purled, slip first st purlwise wyib. (This is often used on sock heel flaps.)
3) Slip the 1st st of every row purlwise, holding yarn to WS.
4) garter st: Slip the first st of every row purlwise with yarn in front (wyif). Move yarn to back & K.
|
Makes a “chain” up the side of the work; often used on sock heels to facilitate picking up sts later, but as above you get only 1 st for every other row.
Can be somewhat loose; hard to make both edges the same tension.
Will be obvious if you are not consistent.
|
|
no sts are twisted;
one selvedge st for every row
|
K1, P1 at beg of row; P1, K1 at end of row.
|
Too bulky except for use as a decorative edge. Will be obvious if you are not consistent.
|

8 comments for “Selvedge or Edge Stitches in Knitting”