B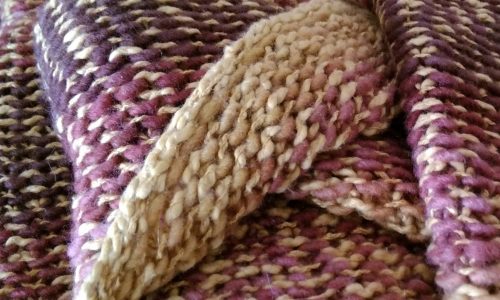 inding off. Well, there’s not a whole lot to say about that, is there? I mean, you’re done knitting, you bind off, right?
While I don’t think quite as many techniques exist for binding off as casting on, still, there are quite a few. And the CO and BO edges can make or break an otherwise lovely project: the main issue being edges that are too tight, and affect the shape of the finished piece.
Regular bind-off / binding off in pattern
Binding off is what I call an “add-on” technique, that is, it is added to whatever you are doing at the time. The act of binding off a st has nothing to do with whether it was knitted, purled, or even slipped (though this is rarely done).
This idea is often stated in instructions as “bind off in pattern”. For example, if you are doing a k2, p2 rib, then you continue to k2 & p2 as you bind off. You would not simply knit across the whole row as you bind off, unless that is the effect you want.
Correctly positioning a bound-off section
This can be tricky, because in order to bind off a particular stitch, you must work the stitch after it.
This point is especially critical to understanding how to properly bind off necklines.
Binding off works like this:
work st #1
work st #2, bind off st #1
work st #3, bind off st #2
work st #4, bind off st #3
See the pattern? In order to bind off stitch #3, we have to work stitch #4. We have worked 4 sts, but we have bound off only 3 of them.
Example:
If you have 30 sts, and you want to bind off the center 10 sts — to be specific, you want to bind off sts #11 through #20 — you must actually work 12 sts before you can bind off st #11.
You work the first 10 sts,
then you work stitch #11,
work stitch #12,
and only then can you bind off #11.
Similarly, you have to work st #21 to bind off st #20 — but #21 then stays on the needle, and continues to be worked in subsequent rows.
Specialty bind-off techniques
Problem: Bind-off edge is too tight
Solution 1: Suspended bind-off
Solution 2: Using a larger needle for bind-off row
Solution 3: K2tog or decrease bind-off
1: Instead of dropping the bound-off st off the tip of the left needle after you have pulled it over, leave it there while you work the next st, and drop it off when you drop the newly worked st. It does work, to knit the next stitch with that old one still on the left needle! Give it a try.
2: Using a needle a size or two larger to work the bind-off row can work well to prevent a tight BO edge, also.
3: For some, the K2tog or decrease BO is enough to solve their tight bind-off problem:
K2tog tbl, place new st back on left needle, repeat.
Problem: Firm or tight bind-off edge required
Solution: 1 over 2 bind-off
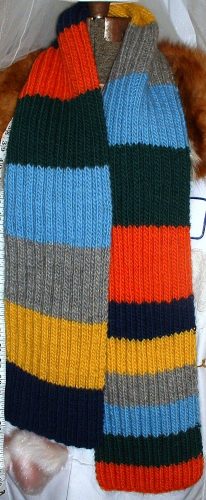 Sometimes you may want a tight CO or BO edge, such as on a knit scarf where you don’t want the ends flaring out. I did a 2 x 2 rib scarf for one of my nieces several years ago, where I wanted the edges to be nice and square, since the rest of the scarf was very geometrical.
In such a case, you can use 1 over 2 bind-off: work the first 3 sts, then pull the first st over the next two (instead of just over 1). Work another st and repeat.
This produces a very tight edge. Thus it is perfect for any edge that you want to stabilize so it is not stretchy, but it is not suitable for any edge that is going to have to stretch — for example it might work well on a wide, boatneck style neckline, to prevent it from stretching out too much, but it would not work well on a regular crew style neckline that has to stretch over a head.
Here’s the scarf: Notice how the ends are nice and square! No flaring here!
(Another design note on this piece: my niece chose the colors, and I did 2 sets of big blocks of each of the 6 colors — and then I was stumped. Two sets was too short, but another set of the big blocks would have made it too long. So I did a set of half-size blocks at the end. Design by problem-solving!)
Problem: Stretchy bind-off needed for ribbed edge (such as socks)
Solution: Tess’ Simple Stretchy Bind-Off
For an elegantly simple, neat-looking yet very stretchy bound-off edge on ribbing, use one of my own inventions: my Simple Stretchy Bind-Off for ribbing.
Here’s what I do, instead of the complicated Surprising thing (which I can never remember and always have to look up):
On every knit st in my ribbing, I do a KFB as I bind off.
So for 2 x 2 ribbing, it would start like this:
KFB in first knit st. You now have 2 sts on the right needle, so BO one of them. (This first K st is different from all the rest.)
{K the next knit st, but leave it on the left needle for a moment. Again, you have 2 sts on the right needle, so BO one of them.
Finish the KFB by knitting in the back of the st that you left on the needle, and now letting it drop off the needle. Once again, you have 2 sts on the right needle, so BO one of them.}
Work all purl sts normally and bind them off normally. Repeat between {} for all subsequent knit sts.
Much simpler and, I think, cleaner-looking than the “surprising” one, and super-stretchy. You can even customize just how stretchy you want it, by changing the number of sts on which you work the KFB.
Problem: The last st of a bind-off row is loose and sloppy
Solution: Tighten the last stitch with an extra loop
Work until you have one st left on the left needle. Slip this st to the right needle.
Use the left needle to pick up a strand just underneath the slipped st, and put this on the right needle together with the last stitch.
Slip the extra loop & the last stitch back to the left needle.
Work the loop and the final stitch together, and bind off the next-to-last st.
Cut yarn and pull through the last st.
Decorative bind-off techniques
Attached I-cord bind-off:
CO 3 sts to LH needle. ** Knit 2 sts, k2tog, replace 3 sts to left needle. **
Of course, if you can attach I-cord, you can attach any other thing to a bound off edge, too. The idea here is that you can knit any kind of narrow piece, and attach it to live sts as you go, with a k2tog (k tog one st from the edging and one live st from the main piece).
Attached lace bind-off:
Creates a saw-tooth shaped lacy edge. The number of sts to bind off must be a multiple of 4. All slips are pwise wyif.
CO 5 sts to left needle. K5, turn.
Row 1: Slip 1; K1, YO twice, K2tog, K1 – 6 sts. Turn.
Row 2: Slip 1; K2, P1, K1, K2tog – 6 sts, one st bound off. Turn.
Row 3: Slip 1; K3, YO twice, K2 – 8 sts. Turn.
Row 4: Slip 1; K2, P1, K3, K2tog – 8 sts, one st bound off. Turn.
Row 5: Slip 1; K1, YO twice, K2tog, K4 – 9 sts. Turn.
Row 6: Slip 1; K5, P1, K1, K2tog – 9 sts, one st bound off. Turn.
Row 7: Slip 1; K8 – 9 sts. Turn.
Row 8: BO 4 sts, K3, K2tog – 5 sts, one st bound off. Turn.Repeat rows 1 – 8 for pattern.
Attached cable bind-off:
“from Eleanor Roosevelt’s personal knitting library, sent to her from an unknown admirer.”
(If this is to be worked in the round – if the beginning is to be joined to the end – then the number of sts to be cast off must be a multiple of 4, to correspond with the number of bind-off rows in the cable pattern repeat.)
CO 12 sts to LH needle.
Row 1: (RS) Slip 1, P2, K6, P2, K2tog — one st from new CO sts, one st from previous work — one st bound off. Turn.
Row 2: Slip 1, K2, P6, K3. Turn.
Row 3: repeat row 1 – one st bound off.
Row 4: repeat row 2.
Row 5: repeat row 1 – one st bound off.
Row 6: repeat row 2.
Row 7: Slip 1, P2, cable 6, P2, K2tog – one st bound off. Turn.
Row 8: repeat row 2.Repeat rows 1 – 8 for pattern.
4 comments for “Binding Off: Problems and Solutions”