So, I continued merrily knitting my way around and around the yoke, down to the point where it gets divided up for the sleeves and bodice. And here is where it gets kind of weird and sort of inexplicable. At least, I can’t explain it. Well, I can explain what I did — but I can’t explain what the pattern says to do.
Remember, I decided not to change the stitch pattern to Granite Rib until I get down past the bust. In the original design, the stitch pattern change occurs three rounds prior to the dividing of the yoke for front, back and sleeves.
So, when I get to that part I know I’ll have a completely different number of stitches (243) than what the pattern says (270) — and I will have to figure out how many of my stitches to allot to each sleeve, the front, and the back.
My first thought was to use percentages. In other words, if the sleeves were each allotted, say, 30% of the pattern’s 270 stitches, I would allot 30% of my 243 stitches. Seems simple enough. So I looked at the stitch counts for how the yoke was divided. In my size, that turned out to be like this: 70 sts for each sleeve (140 total); 80 sts for the front; 25 + 25 = 50 sts for the back.
WHOA WHOA WHOA.
80 sts for the front, and 50 sts for the back? That can’t possibly be right.
Maybe not, but it is how the pattern is written — and it tracks through all the sizes, too. The largest size has 110 sts on the front, and 70 sts on the back. I checked them all. That’s how much I couldn’t believe this.
And then I remembered reading, on more than one of the Ravelry projects, remarks like these:
I didn’t like how the back is tight from one sleeve to the next but perhaps I should have knit a bigger size. It caused the sleeves to look pulled to the back.
the back was way too narrow. The arm holes were starting about an inch or more behind my arm.
Well. So much for using the same percentages.
So now what do we do? Because we sure as hell aren’t doing THAT. Design issue #3 is the weird distribution of sts between front and back.
My solution: (Click on any picture to see a larger version)
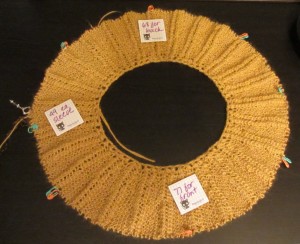
First, when I got to the stitch pattern change round, I put the whole thing on a string so I could lay it completely flat. I did it here rather than at the actual dividing point, because while I was working on the yoke, I had decided that while I would keep the bodice stitches in the seed stitch pattern, I would change the sleeves to the Granite Rib stitch as indicated. Nothing like a little extra challenge, eh?
(Subsequently, I left the string in as a lifeline, in case the whole thing went haywire. Good insurance.)
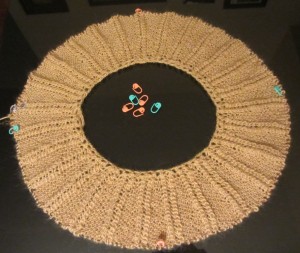 I counted 27 pattern repeats around the yoke. This is an odd number, which means there is no way to have two even sleeves and a matching back and front. (Maybe this is part of the reason for the mismatch in the original pattern? But still, it isn’t 30 sts’ worth. I am still mystified.)
So I started out by marking a center front and a center back, using orange clips. You can see the mismatch between the front and the back, in that one clip is between a couple of ribs, and the other is in the middle of the seed st section. Well, that’s liveable. I decided to make the seed st section the front, so I wouldn’t have two ribs running right between my boobs.
I marked the approximate center of each sleeve with green clips, to help keep my wits about me.
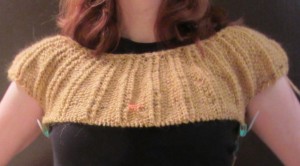
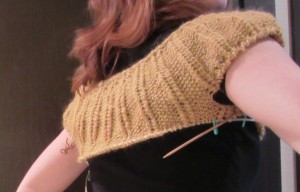
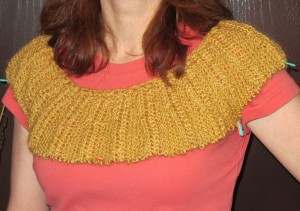 Next, I had to decide just how big the sleeves were going to be. Here I used what we called the “brute-force method” in engineering school. I just put the yoke on and clipped in a pair of clips in each of my armpit regions. (I used a pair to keep them distinguishable from the center front and other single markers.) It is a bit tricky and a little less accurate, but I was just able to manage to get some clips in the back section at approximately the armpits, too.
This gave me a starting point for how big the sleeve sections needed to be. Note: remember, there will be underarm ease added when the yoke is divided, so all we have to worry about right at the moment is where the armpit is.
I counted the number of sts in each of my “sleeves” and took an average. After that, it was a matter of laying the yoke out flat again and finessing the placement of the armpit markers, so that the stitch pattern is symmetrical with respect to each of the parts. You don’t want the front to have a double rib over on the left and a seed st section on the right.
After some trial and error, I ended up with sleeves that start and end with the double rib. I double-checked all the stitch counts in each section, because I don’t intend to have to do all this a second time. You can see the back and front differ by 9 stitches, or one pattern repeat. That’s the best we’re going to be able to do. Not too bad, all things considered.
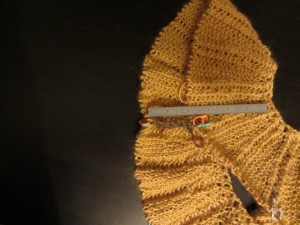 Finally, I did a mock-up of the underarm ease: I tied a 2-inch loop of scrap yarn in between each set of marker pairs, like so:
…and then I tried the whole thing on again. I was happy enough with the results to forge ahead.
And then I had to rip back to my lifeline, because if you’ll notice, in the picture with the stitch counts, my beginning of the round marker over on the left side there is just about where my center of the sleeve marker is. It turns out this is a lousy place to begin the round.
So I moved all my new dividing-up markers by about three pattern repeats, double checked everything again, and forged ahead a second time.
I added 9 sts under each arm to get a design standard 2″ of underarm ease. Just to keep myself on my toes, I decided to knit these underarm sections in Granite Rib, while maintaining the rest of the bodice in the seed stitch pattern.
An inch or two into the bodice, and things are looking pretty good! Well, my pictures are a little blurry, but you get the idea. The front fits nicely; the back, if anything, is a trifle loose. I am not complaining!

