
Oh, happy day! DH has another pair of handknit socks, and I have one less UFO. (Believe it or not, I’m down to just SIX UFO’s. My advice is to keep an eye out for plagues of locusts.)
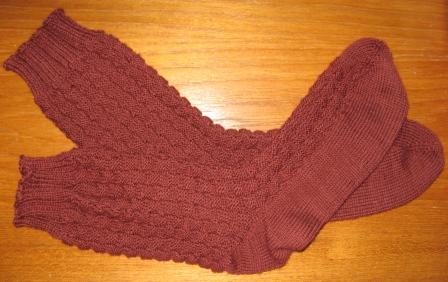
I started these socks on the trip to New Zealand, with yarn I bought there: Naturally Haven, a 100% NZ merino wool 4-ply, from Naturally Hand Knit Yarns, out of Auckland. The yarn was nice to work with — it has a soft hand and a little “plushiness” to it. I used US size 0 needles to end up with a gauge of 9 sts per inch, and got a really nice sock fabric that DH says may be his favorite pair yet (although I think he is smart enough now to say that about every new pair).
The label recommends US size 1-3 needles to get 7 sts per inch — which adds another data point to bear out my hypothesis that yarn companies’ suggested gauges these days are generally too loose for my taste.
Of course, I didn’t bring my set of Barbara Walker stitch dictionaries along to New Zealand, so this pair is done in a simple 4 x 4 allover basketweave pattern.
- ** 4 knits, 4 purls ** and repeat around for 4 rounds.
- Switch to ** 4 purls, 4 knits ** — putting blocks of purls above blocks of knits, and vice versa — and repeat for another 4 rounds.
- Repeat these two sets of blocks for as long as you can stand it.
More than one knitter has asked me if I’m going to write this up as a Polar Bear pattern. I hadn’t planned on it, since the whole thing seems pretty simple to me and I’m sure there are more than a few patterns for similar socks out there already. (In fact, there are at least a few thousand. Just for fun, I googled it — and found “about 8,190 results for men basket weave sock knit pattern.”)
Then I thought, well, it might be worth it to dissect the process of “designing” this sock as a couple of blog posts.
I put that word “design” in quotes there, because I really hesitate to use the word to describe what I did with these socks.
I know there are a lot of people who use the word rather freely, as in, “I knit this scarf from a pattern, but I changed the color, so that means I designed it myself.”
But there is not so much in the knitting world that is really new or innovative — which are a couple of qualities that I personally think are required for something to be your own “design”. Just because you changed the gauge or used a different yarn does not a designer make, IMHO.
I remember a knitter a few years ago showing me a pair of socks that were knit by, let’s say her great-grandmother, because I can’t remember exactly — for someone who was in WWII (or maybe even WWI). Those socks were also a simple allover basketweave pattern — although if memory serves, I think the gauge on those was so tiny it was like a 7 x 7 basketweave to get about the same size squares. Yikes.
To me, the fact that someone else knitted what amounts to the same pair of socks, decades before I was even born, says pretty clearly that this pair isn’t exactly what you would call a “designer original”. Well, not unless you were trying to sell style instead of substance, anyway — or your knitting ego really needs a boost.
At the outside, one could say perhaps mine were “inspired” by that pair — which does sound better than “more-or-less a copy of”.
So whether you want to call it “design” — or simply some smarts, some expertise and some math — here’s how the process went.
Step 1 was to know a few things about what I wanted to end up with.
- * I knew from experience that DH prefers socks that are about 7″ or 7.25″ around.
- * I knew that this yarn was going to require probably the smallest needle size I had with me, to get a nice firm sock fabric that will wear well.
- * I wanted something that looked a little more interesting than plain stockinette, since the yarn is very plain — but not too complicated to execute, either, so I could easily keep track of it, and would not have to do too many acrobatics around the heel to accommodate the stitch pattern.
- * Of course, it had to be something DH would like — fortunately, he prefers fairly basic socks in what I think of as “manly” patterns — mainly simple geometrics.
So from these considerations come the basics: finished size = 7″ or so circumference; needles = smallest I’ve got on hand; and stitch pattern = a basic basketweave.
Step 2 was to know how to knit a sock. And preferably, to know several ways of knitting socks, so I can choose the method best suited to my biggest constraints: in this case, materials and circumstances.
My material constraint was that I had exactly two balls of yarn, from a country that was going to be a very long way away in the event that I ran out. So, I chose to knit these socks toe-up rather than top-down — which is also a good trick for utilizing handspun efficiently, or indeed any time you are unsure about your yarn quantity. (I ended up using all but about a yard or two of the yarn. Nicely done, if I say it myself.)
My circumstances were that I didn’t have much internet access, and my knitting library was a long ways away, so I’d better choose a method that I could easily do from memory. I had the foresight to print off a copy of Judy Becker’s toe-up cast-on before I left — which is the only part of a toe-up sock that I can’t always do independently — so I did have that resource available. Also I didn’t want to do a lot of note-taking in order to be able to reproduce the second sock. In other words, now was not the time to be trying to learn something new! Experimentation has its essential place in designing, but here the goal is not so much a “design” as a pair of socks.
So from all this, we can choose our method: toe-up sock with all my standard favorite techniques.
A bonus here is that this choice eliminates any swatching for gauge, since I can just start the toe out with oh, say, 10 sts per side (20 sts total) and increase until the toe is big enough, and that will determine how many sts I’ll have on the main body of the sock. When I have that info, I’ll figure out the details of the stitch pattern.
The basketweave st pattern that I have tentatively selected should present no problems in terms of the multiple — although it’s worth mentioning that at this point in the sock, I haven’t really specified the st pattern, other than figuring it’s going to be a basketweave. I am thinking it will be a standard 4 x 4, and as long as my number of sts ends up being a multiple of 8, that will work out fine — but it could still end up being a 5 x 5, or a 3 x 3 basketweave, if that better suits the number of sts on the sock.
But that’s a little ways off yet. Right now, we have enough to get started on the toe, and work our way up to the total number of sts for the foot. Remember our goal is a 7″ or slightly larger sock, so we continue the toe increases until we have a little tube that is about 3.5″ across. This happens at 64 sts total.
BTW, notice that gauge hasn’t actually entered into this at all yet? In fact, I never measured the gauge on these socks until today, when I started writing about them. It’s right at 9 sts per inch, of course — 64 sts divided by 9 sts per inch gets us that 7″ worth of sock. But I didn’t need to know that to knit them! HA! This is perhaps the biggest reason I prefer to knit toe-up socks.
And somewhere in here we confirm that the needle size selection is indeed giving us a nice, firm sock fabric. This check is not so much a positive identification — it’s more of a NOT thinking, “This fabric is kind of loosey-goosey for a sock.”
OK, so where are we?
Suitable fabric? Check.
Fits the foot? Check.
Multiple of 8 sts? How nice and convenient! Sometimes you catch a break.
An excellent start, then. More to come!
3 comments for “Sock Design 101: Part 1”