
Well, an update on the stupid wrap cardigan is loooong overdue.
Last post, it was late at night and I had just used the wrong size needles to restart the upper back. Remember? I sure do.
I had re-swatched on a size 4 needle to try to get a bit firmer fabric, because after steaming, the size-6-needle-fabric relaxed and got a little too limp.
I finally figured out a way to try to show you the difference: I taped my swatches to a window and took a picture.
See how the fabric in the upper part of the photo is looser than the fabric in the lower part? Size 6 needle vs. size 4 needle. The looser fabric is, IMHO, just a bit too loose for a garment fabric. (If you’re keeping close count, you’ll know that I have two large "swatches" of that fabric, so I have ample evidence.)
As I’ve mentioned before, the suggested gauges on many current yarns seem too loose to me to make a decent garment fabric. This seems to me to have changed in, say, the past 5-6 years or so. Older yarns seem to have firmer suggested gauges, in general.
I suppose this change could be due to a proliferation of scarf knitters — of course you want a scarf fabric to be looser than a garment fabric, but the suggested gauge on a yarn label has always been understood to be a garment fabric gauge, not a scarf fabric gauge. At least, that’s the way I always understood it.
Maybe it’s a plot on the part of the yarn manufacturers to get people to knit baggy garments that will not last, so you’ll need to go buy more yarn for another sweater sooner!
Because I’m sure that you, like me, are waiting to buy more yarn until your entire current knitted wardrobe breathes its last.
Anyway — to continue with the knitting of the cardigan. OK, now I have a firmer fabric that has been properly steamed prior to taking the gauge measurements. I end up with a gauge of
- 5.3 sts per inch
- and
- 7.1 rows per inch
My desired upper back width is 13 inches. I am not allowing anything for borders at the armhole edges, because I intend to add sleeves.
So that’s easy: 5.3 sts make 1 inch, so 5.3 x 13 = 68.9 sts to make 13 inches.
I always add selvedge sts, so I’ll be casting on 69 + 2 = 71 sts.
Now here is one place where my opinion differs strongly from Ms. Walker’s: she says to use a provisional cast-on, so you can easily pick up sts across the shoulders and knit the fronts. While a provisional cast-on is a lovely technique that does make a beautiful seamless join — here across the shoulders, what we need is a little structure, as explained in the first post. So I’m going to use good ol’ long-tail cast-on, which is going to be just fine for picking up stitches later on.
OK, 71 sts cast on, work 1 WS row, work 1 RS row. Check.
BTW, note that it is very important to start with a WS row here, due to the decision we just made about the cast-on. Long-tail cast-on is actually equivalent to the e-wrap cast-on with a row of knitting worked into it, so in effect, we have already done one row of knit — so the next row must be purl, if we don’t want a row of garter stitch across the shoulders.
Now we start working short rows across the shoulders. I’m not going to reproduce BW’s work here — you should own this book for yourself, anyway. But suffice it to say that due to the short rowing, I end up with 13 rows at the center of my garment, and 5 rows at each edge. I’ll give you a little heads-up here: when counting rows on the front and the back pieces to keep the armholes even and such, use the number of rows at the edges — not the center — for counting. Due to the fact that you have a neck, the center of the front is going to disappear, and the first pair of short rows actually goes away — so even at the neck edges of the front, the row count isn’t the same as the center back. (Go ahead — ask me how I know.)
Also, as far as I can tell, no matter how many short rows you do, you will have 5 rows at the armhole edges when you are done with the short-rowing.
Critical fit point #1 = armhole depth. As you may know, this is one of my big issues. BW says to work the piece straight until it is even with the underarm, then start to increase on either side every other row "until the back piece has widened to within 1" – 2" of the side underarm line."
This is a little too vague for me, so I do a little more math:
My total desired chest circumference = 36 inches. Take out 2 inches on either side for the underarm = 32 inches. Half of that (for the back only) is 16 inches. 16 inches x 5.3 sts / in = 85 sts.
I already have 13 inches = 71 sts. I will be increasing (85 – 71) = 14 sts, and at a rate of one inc on each side, and inc’ing every other row, that means 14 rows worth of increasing. 14 rows at 7.1 rows per inch is just about 2 inches worth of armhole that will be made during those increases.
I want my total armhole depth to be 7.5 ins, so I need to start the increases 2 inches shy of that, at 5.5 inches, or around about row 39, give or take. No problem.
Well, that’s what I did. Then I flipped the piece over, picked up on each shoulder for the fronts, and did almost the same thing. I admit, keeping track of what you are doing on the short rows is not all that easy when there are a bunch of sts missing in the middle. But I think I managed.
As for the neck shaping, I just did what BW told me to do: work straight for 3 inches, then start increasing the fronts towards each other at a rate of once every 4 rows, for a V neck. And by this time, I had to write up a little tracking sheet to — well, keep track of all these things.
Once the fronts are also worked to the underarm, we join ’em up, and cast on some additional sts at the underarms — 2 inches worth apiece, as noted above.
Then comes the moment of truth: trying it on… OK, admittedly, these are lousy, out-of-focus, late-at-night-in-a-mirror pictures, and admittedly, I’ve knitted a bit further than the armholes. (Oh, believe me, you’ll hear about it. All in good time.)
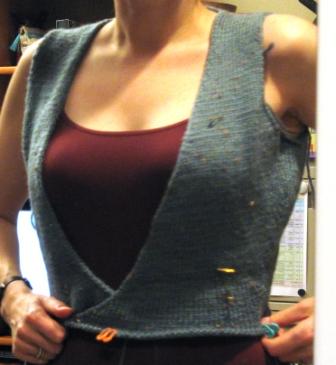
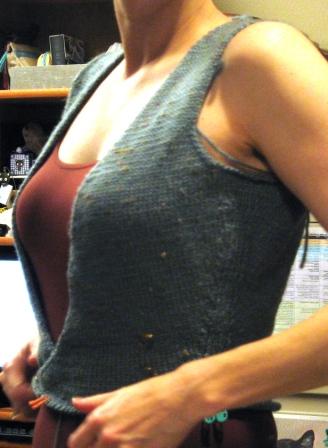
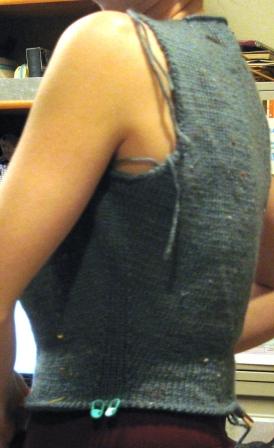
but hot damn! what a great fitting armhole!